Show Your Holé Button Covers Some Love!
We of course love Holé button covers and whilst we and many of our customers sing their praises, February is the ideal time to get creative and show your button covers a bit of love! Read on for some ideas to customise your Holé button cover...

As we begin to catch some early glimmers of spring and start seeing new signs of life as daffodils begin to bloom, we stand on the cusp of a new season, but those dreary days of winter continue clinging on, leaving many of us still in hibernation mode.
As February is the month of love thanks to both Galentines and Valentines Day (also pancake day, what's not to love?!), we thought now would be the ideal time to show you a couple of fun ways to customise your Holé button covers so you can show them the love they deserve. We often match or theme our other accessories to the season or what we're wearing, so why not our button covers too?
Vinyl Cut Flowers & Hearts
It's time for me to 'fess up. I recently got a Cricut Joy and if you've not heard of them, they bascially take over your life and become a bit of an obsession. They are essentially a digital cutting machine, allowing you to make anything from designs for tshirts to mugs using a variety of different mediums.
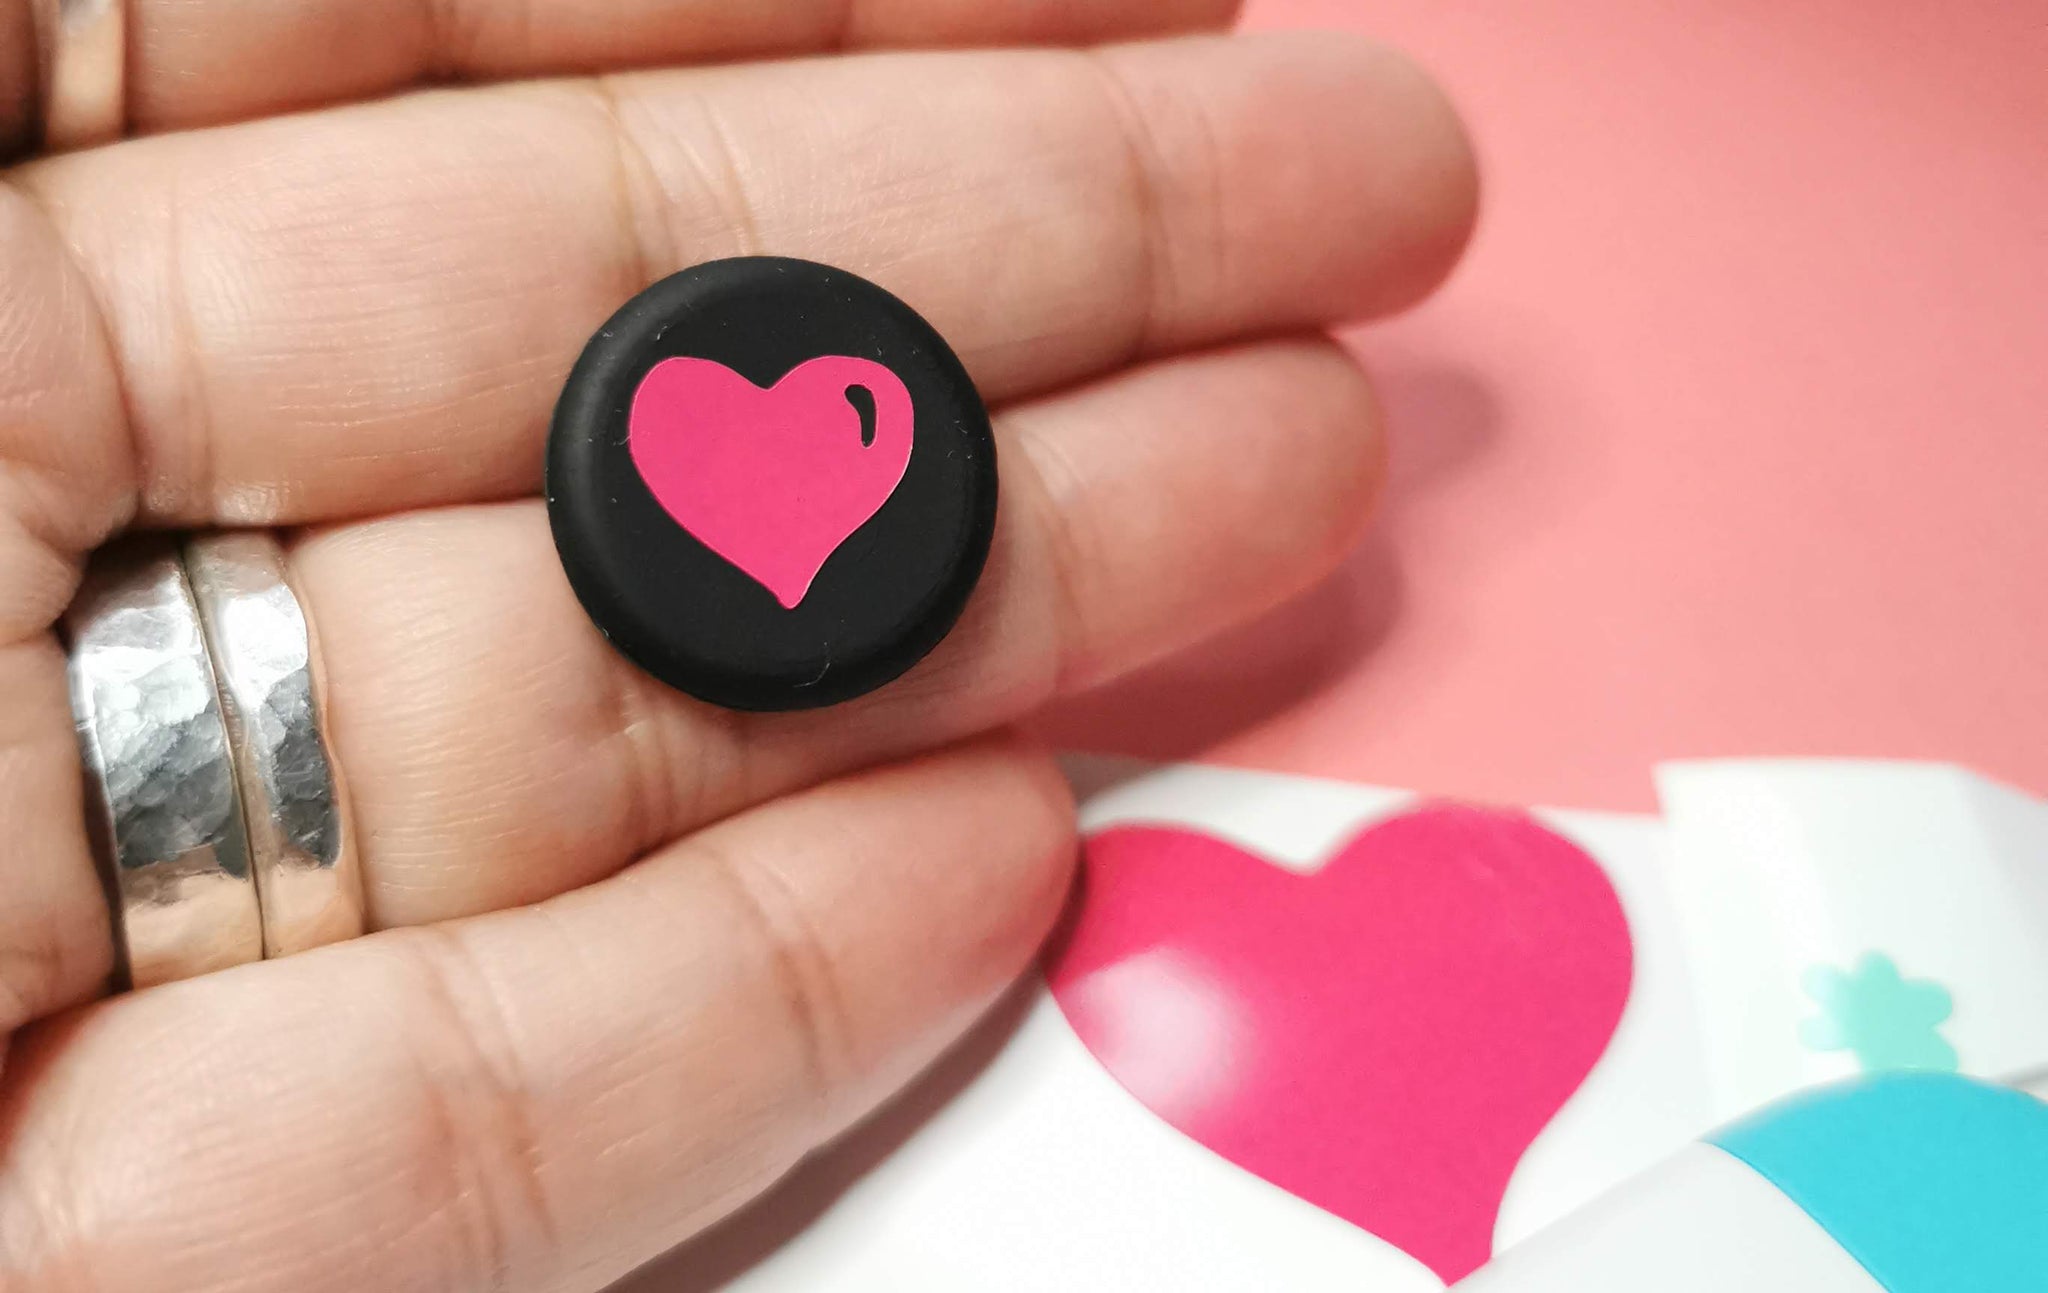
For this post however, I wanted to show you what I've created using my Cricut Joy and permanant vinyl and I think the results are adorable!
If something can be customised and made to look more individual, you'd better believe i'm all over it, and there's a huge crafting community of creators making stickers, decals and more with their cutting machines.
Here's what to do using a Cricut machine, but a similar process is involved regardless of what machine type you use.
In this instance, I was inspired by spring and love, so I thought a daisy and heart designs would be simple and ideal.
Step by Step Cricuit Instructions
- Decide what design you're going to go for (something simple works best due to the small size)
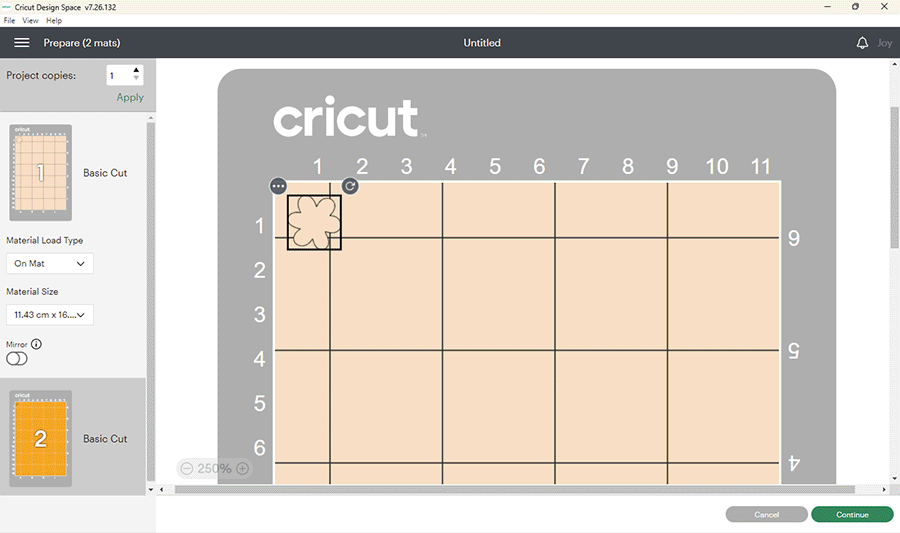
- Open up Cricut Design Space on your computer or app and search for an image to use - in this case I searched for "flower" then again for "hearts"
- Add your chosen image to a new canvas
- Check the size and resize to between 1cm and 1.3cm (our button covers are approximately 1.4cm, so it's best to make your design smaller than this)
- Create your project, ensuring you choose the "cut" operation type
- To make the most of your vinyl, you might want to cut a row of multiple things at the same time to avoid waste
- Follow the on-screen instructions, ensuring you've selected the correct material type and loading method and have the right tool(s) in the machine
- Once cut, roughy cut around the design you want to add to your button cover and use a small piece of transfer tape
- Ensure your button cover is clean and dry and then transfer your design (I found it easiest to use the rounded corner of my snoothing tool to do this) then remove the transfer tape
Cricut brand permanent vinyl is quite robust and is stated as being dishwasher safe, and my design has survived in a 30 degree wash in the washing machine, though you might prefer to use removable vinyl so you can switch up your look more easily or want to remove the vinyl remove before washing your jeans.

Nail Art Stickers
Of course not everyone has their own cutting machine, so if you're either creativley challenged or looking for something that's a bit easier, a great option that's also inexpensive, is to use nail stickers. As button covers are so small, nail stickers are the ideal size.
The downside of nail stickers is that they won't last as long on your button covers, but it does make it super easy to change up your look whenever you want to!
If you already have nail stickers, great, if not, you can buy them easily and inexpensively online.

Step by Step Nail Sticker Instructions
- Choose your nail stickers and if you'll be using more than one to make a more complex design, sketch out your design idea in rough first
- Make sure your button cover is clean and dry
- Use tweezers to remove your preferred nail sticker, position over your button cover then press on firmly with the pad of a finger
- That's it!
We hope you've had a bit of fun with this post which is a departure from what we usually write about, but variety is the spice of life right?
If you've not tried our metallic button covers yet, find out more about them here.